How to Build a Fence: A Step-by-Step Guide
Building a fence is a big home improvement project. It boosts privacy, security, and property value. This guide takes you through the whole process, from planning to installation.
It covers different fence types like wood, vinyl, and metal. It also stresses the need to follow local building codes and property line rules. You'll learn about the tools and materials needed for your DIY fence project.
Looking to make your backyard private or define property lines? This guide will help. We'll cover everything from local rules to material selection and installation techniques. By the end, you'll know how to build a fence and improve your outdoor space.
Planning and Preparation Essentials
Before starting your fence project, it's important to do some groundwork. First, learn about the fence regulations and zoning laws in your area. Understand any height limits, setback rules, and what permits you need. Getting the right permits can prevent problems later and make sure your fence meets local codes.
Think about why you want a fence. Do you need more privacy, better security, or a nice fence design? This will help you choose the right style, materials, and height. After deciding, measure your property lines carefully. Use official maps or a surveyor to get accurate measurements. This ensures your fence is in the right place and avoids issues with neighbors.
Also, talk to your neighbors about your fence plans. This can clear up any worries they have and keep things friendly during construction. With careful planning, your fence project will go smoothly.
Essential Tools and Materials for Fence Building
Before starting your fence project, make sure you have all the right tools and materials. The right tools can make the job easier and faster. Let's look at what you need to build a strong and lasting fence.
You'll first need a good post hole digger or auger. This tool is key for digging holes for your fence posts. A high-quality digger ensures holes are the same size. You'll also need a level to make sure your posts are straight and vertical.
Other important tools include a measuring tape, saw, hammer or nail gun, and a power drill. These help you measure, cut, and secure your fence parts. For materials, you'll need fence posts, panels or pickets, rails, concrete mix, gravel, and fasteners like screws or nails. The materials you choose depend on the type of fence you want, like wood, cedar, vinyl, or metal.
- Post hole digger or auger
- Level
- Measuring tape
- Saw
- Hammer or nail gun
- Power drill
- Fence posts
- Fence panels or pickets
- Rails
- Concrete mix
- Gravel
- Fasteners (screws or nails)
When picking materials, think about how durable they are, how much upkeep they need, and how they look. Don't forget safety gear like gloves, goggles, and ear protection for the job.
| Tool | Description | Estimated Usage Ratio |
|---|---|---|
| Measuring Wheel/Tape Measure | Used for accurately measuring fence lines and post spacing | 50:50 (Measuring Wheel vs. Tape Measure with two people) |
| Posthole Digger | Essential for creating holes for fence posts | Popular brands: Kobalt and Blue Hawk |
| Concrete | Recommended for anchoring fence posts instead of dirt or gravel | 100% preference for Ready Mix Concrete |
| String Line | Used to ensure straight post alignment and layout | 100% usage among fencing professionals |
| Sharpie | Silver Sharpie recommended for marking and cutting aluminum fence panels | Specific tool preference in the industry |
| Hand-held Band Saw | Useful for cutting wider sections of aluminum fence panels | Relevant tool for fence building |
| Level | Essential for ensuring post alignment and verticality | 100% usage on every post |
| Cordless Drill Gun | Recommended for quicker screw and hardware installation | Preference for efficiency in fence building |
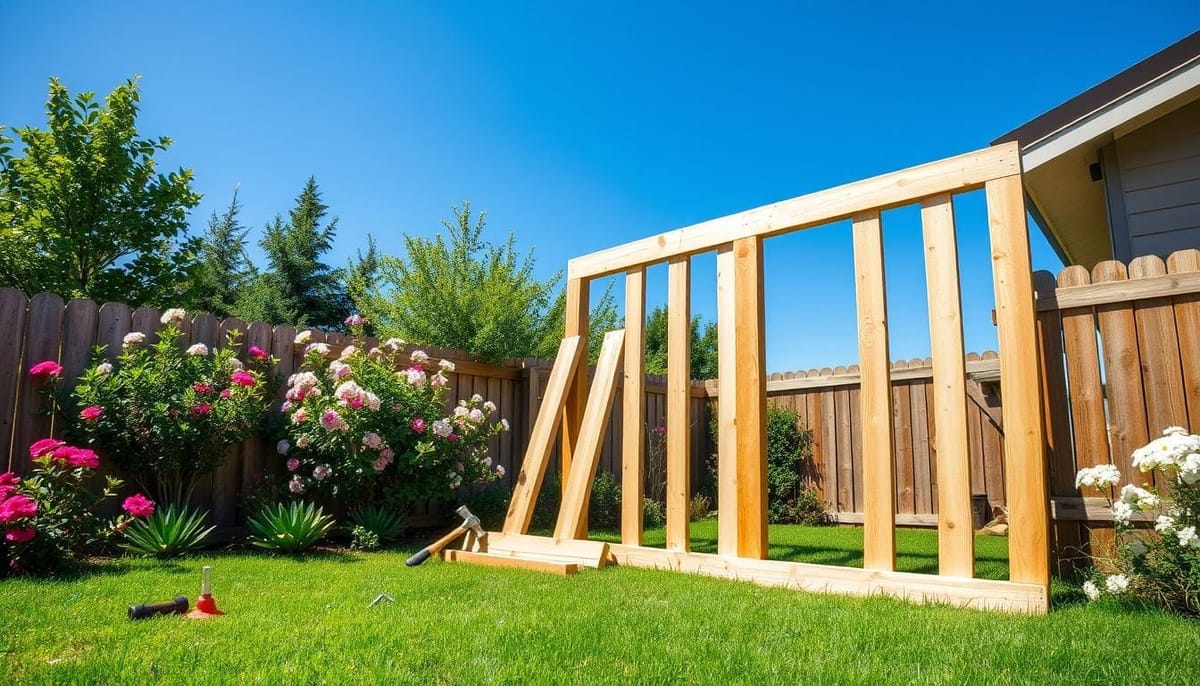
How to Build a Fence: Foundation and Layout
Building a fence begins with a strong foundation and the right layout. First, mark where the fence posts will go along your property lines. Posts are usually 6 to 8 feet apart, based on local rules and fence type. Use spray paint or flags to show where each post will be.
Marking Post Locations
To make sure corners are square, use the 3-4-5 method. Measure 3 feet on one side, 4 feet on the next, and check if the distance is 5 feet. This method helps you get a square corner. Do this at every corner to keep the fence straight.
Proper Post Spacing Techniques
Keeping post spacing even is key for a straight fence. Measure the space between posts and adjust to keep it between 6 to 8 feet. If your land is sloped, you might need to change post spacing for the slope.
Creating a Level String Line
To keep the fence height even, make a level string line. Stretch it between post marks, making sure it's tight and level. This line will guide you when digging holes and setting posts.
Double-check all your measurements and alignment before moving on. Proper planning and layout ensure your fence is straight and well-placed.
Post Installation and Concrete Setting
Proper fence post installation is key for a stable and lasting fence. You need to dig holes to the right depth, considering the frost line. Then, set the posts in concrete carefully. This way, your fence will last a long time.
Begin by digging holes that are three times the post's width. Make them as deep as one-third to one-half of the post's height above ground, plus 6 inches for gravel. This depth ensures the posts are firmly anchored and protects against frost heaving.
Before placing the posts, add a 6-inch gravel layer at the hole's bottom. This helps with concrete setting and prevents moisture buildup, which can cause rot. Place the posts and level them. Then, mix and pour concrete, leaving 3-4 inches at the top.
- Dig post holes 3 times the width of the post and 1/3 to 1/2 the post height, plus 6 inches for gravel
- Add a 6-inch gravel base to the bottom of each hole
- Set posts in place and use a level to check for plumb
- Mix and pour concrete, filling the hole to 3-4 inches below ground level
- Allow the concrete to fully cure for at least 24 hours before proceeding
Let the concrete cure for 24 to 48 hours before finishing the fence. Fast-setting concrete can dry in 20-40 minutes, speeding up the process. Once cured, you can start adding rails and panels.
By following these steps for fence post installation and concrete setting, you'll get a strong fence foundation. Always check local building codes and consider soil type and frost line for the best outcome.
Installing Rails and Panels
After setting up the fence posts, it's time to install the rails and panels. Whether you're making a rail fence or a panel fence, paying close attention to detail is key. This ensures your fence is both sturdy and looks great.
Securing Rails to Posts
To attach rails to posts for rail fences, use deck screws or galvanized nails. Make sure the rails are level and well-attached to the posts. The top rail should be 7-8 inches from the top, and the bottom rail 7-8 inches from the ground. Cedar material is less likely to bow compared to treated or pine materials. For a six-foot fence, use three rails per bay. For a four-foot fence, use two rails per bay.
Panel Installation Methods
For panel fences, lift and place the pre-assembled panels between the posts. Secure them with the right hardware. Posts are set at 7 feet 10 inches center to center for railing the fence. Always join rails at the post's center, using two sixteen penny nails at each end.
Dealing with Slopes and Grades
For sloped or uneven yards, you can either step the fence sections or follow the land's contour. Stepped fences keep panels level between posts but adjust post heights. Contoured fences use flexible materials or custom panels to match the terrain. The rails should flow with the grade once the installation is complete.
Check for level and plumb regularly to keep your fence straight and looking good. With careful attention, your fence will not only work well but also improve your property's look.
| Fence Height | Rails per Bay | Post Spacing | Rail Placement |
|---|---|---|---|
| 4 ft | 2 | 7 ft 10 in | 7-8 in from top and bottom |
| 6 ft | 3 | 7 ft 10 in | 7-8 in from top and bottom |
| 8 ft | 3 | 7 ft 10 in | 7-8 in from top and bottom |
Adding Finishing Touches
Now that your fence's base is set, it's time for the final touches. These steps will make your fence look great and work well. You'll add gates and decorative elements to complete the look.
Fence Gate Installation
Start by putting in gates where you want them. Make sure they swing freely and fit right. Use strong gate hardware for a lasting installation.
Protect Your Posts with Caps
Finish your fence posts with post caps. They keep the posts safe from weather and add style. You can pick from wood, metal, or PVC to match your fence's look.
Staining and Sealing Wooden Fences
Wood fences need a stain or sealant to last. It keeps the wood safe from rain, sun, and weather. Pick a color that fits the wood or stands out.
Decorative Finishing Touches
Think about adding lattice tops or ornamental post finials. They make your fence look amazing. These details turn a simple fence into a beautiful outdoor feature.
Check your fence carefully after finishing. Make sure it's stable and looks good. Trim any extra material and check all fasteners. With these steps, your fence will be a beautiful part of your home.
| Material | Estimated Lifespan | Maintenance Requirements |
|---|---|---|
| Wood Fence | 15-20 years | Regular cleaning, staining/painting, checking for damage |
| Vinyl Fence | Durable in all weather conditions | Minimal, occasional cleaning |
| Wrought Iron Fence | 80 years | Low, periodic painting or rust prevention |
https://www.youtube.com/watch?v=INJ9rxkCpB0
Conclusion
Building a fence is a rewarding DIY project. It boosts your property's security, privacy, and looks. This guide has shown you how to plan, prepare, install, and finish your fence. Don't forget to keep up with fence maintenance to make it last longer.
A good fence does more than just protect your property. It also increases property value and makes your home look better. With the right care, your fence will be a joy for years. It will match your home's style, making your outdoor area look great.
Be proud of your DIY success and how your property has changed. Your new fence brings privacy, security, and beauty. By using this guide, you've learned a lot about fence building. Your hard work will make your home and neighborhood even more attractive.
FAQ
What is the primary purpose of building a fence?
Fences can serve various purposes. They can enhance privacy, improve security, and increase property value.
What are the essential factors to consider before starting a fence project?
Before starting, research local building codes and get necessary permits. Determine the fence's purpose and measure your property lines accurately. Also, consult with neighbors.
What tools and materials are required for fence building?
You'll need a post hole digger or auger, level, measuring tape, saw, hammer or nail gun, and power drill. Also, get fence posts, panels or pickets, rails, concrete mix, gravel, and fasteners.
How do I ensure proper post installation for a stable fence?
For stable posts, dig holes to a depth of one-third the post height plus 6 inches for gravel. Make sure to go below the frost line. Use a level to ensure posts are plumb and brace them while the concrete sets.
What are the best practices for installing rails and panels?
For rail fences, attach horizontal rails to posts using deck screws or galvanized nails. Ensure they're level and securely fastened. For panel fences, lift and position pre-assembled panels between posts, securing them with hardware.
How do I address slopes and grades when building a fence?
For slopes, you can step the fence sections or follow the land's contour. For stepped fences, maintain level panels between posts while adjusting height at each post. For contoured fences, use flexible materials or custom-cut panels to follow the terrain.
What are the essential finishing touches for a fence?
Essential touches include installing gates and adding post caps. Apply weather-resistant stain or sealant for wood fences. Also, install decorative elements like lattice tops or ornamental post finials.
Fyxes
Thoughts, stories and ideas.