How to Build a Shed: A Step-by-Step Guide
Building your own shed can be a fun DIY project. It gives you extra storage and makes your backyard look better. This guide will help you from start to finish. It's perfect for anyone, whether you're experienced or new to building.
We're focusing on a 10 by 20 ft shed, but you can adjust the size. We'll cover important steps like checking local codes and picking the right spot. You'll also learn about tools, materials, and how to build the shed.
This guide is great for anyone wanting a storage solution or a DIY challenge. It will help you build a shed that's both useful and beautiful. Let's start making your shed today!
Essential Planning and Preparation
Before starting your shed project, thorough planning and preparation are key. This step ensures your project goes smoothly and meets local building codes. Let's look at the important things to consider during this phase.
Checking Local Building Codes and Permits
First, check with your local building department about permits and regulations. The size and location of your shed might affect if you need a permit. Sheds under 120 square feet might not need one, but always check. Not getting the right permits can cause legal issues, fines, and safety problems.
Choosing the Right Location
Finding the best spot for your shed is as important as building it. Pick a spot that's level, well-drained, and easy to get to. Consider the sun, wind, and how close it is to your house or other buildings. This ensures your shed lasts long and works well.
Gathering Required Tools and Materials
Having the right tools and materials is crucial for a successful project. You'll need a circular saw, drill, framing square, level, and hand tools. For materials, get pressure-treated lumber, plywood, roofing supplies, and the right fasteners. Making a detailed list helps you stay organized and avoid last-minute trips.
By focusing on these planning and preparation steps, you'll make your shed project easier. Remember, good planning saves time, money, and stress later on.
| Required Tools | Essential Materials |
|---|---|
|
|
For more tips and insights on shed construction planning, see our detailed guide on preparing for a shed project.
Building a Strong Foundation
Building a solid shed foundation is key for your shed's long life and stability. The foundation is the base of your shed, so it must be strong.
Start by making the ground level where your shed will sit. An uneven ground can cause your shed to lean or wobble. Use concrete pier blocks to level the ground. Place them 4 feet apart in one direction and 6 feet apart in the other for a 12 by 8 feet shed.
- Larger sheds — 160 square feet and up — will need 4 feet of clearance around the perimeter.
- Post holes should be dug 12 inches in diameter and 12 inches below the frost line.
- Use treated lumber rated for ground contact for the posts and runners.
| Foundation Type | Suitable Shed Size | Key Features |
|---|---|---|
| Concrete Paver | Up to 160 sq ft | Easy to install, budget-friendly, best for flat and well-draining soil. |
| Treated Wood Frame with Gravel | Up to 160 sq ft | Versatile, excellent drainage, can be built on small slopes. |
| Treated Wood Frame on Concrete Blocks | Up to 160 sq ft | Provides additional stability, suitable for areas with low winds, can accommodate some slope. |
| Treated Wood Frame on Concrete Piers | Any size | Long-lasting, suitable for any soil or slope, may require more labor to install. |
After leveling the ground, put in the support beams across the deck piers. Secure them with metal straps and nails. Add rim joists along the outer edge of each support beam. This forms the base for your floor joists. Make sure the whole foundation is level and stable for a solid start on your shed.
How to Build a Shed Floor Frame
Building a strong shed floor is key for your shed's life and stability. The floor frame's foundation is vital for supporting the shed and its weight. Here's how to build a shed floor frame for a solid base.
Installing Floor Joists
The first step is to install the floor joists. Use pressure-treated 2x6 lumber for these beams, spaced 16 inches apart. Lay them across the floor, making sure they're level and fixed to the foundation. Add blocking between the joists for extra stability.
Adding Floor Sheeting
After the joists are set, add the floor sheeting. Use 3/4 inch plywood flooring and secure it with galvanized nails or screws. For a 12 by 8 feet shed, you'll need two 4x8 ft plywood sheets and a third cut in half. Apply construction adhesive to prevent creaking and instability.
Waterproofing the Base
To keep your shed floor dry, waterproof the base. Use a moisture barrier, like a polyethylene sheet, over the joists before adding plywood. Or, treat the wood with a water-resistant sealant or stain.
By following these steps, you'll have a strong shed floor frame. Always check local building codes to meet the necessary requirements.
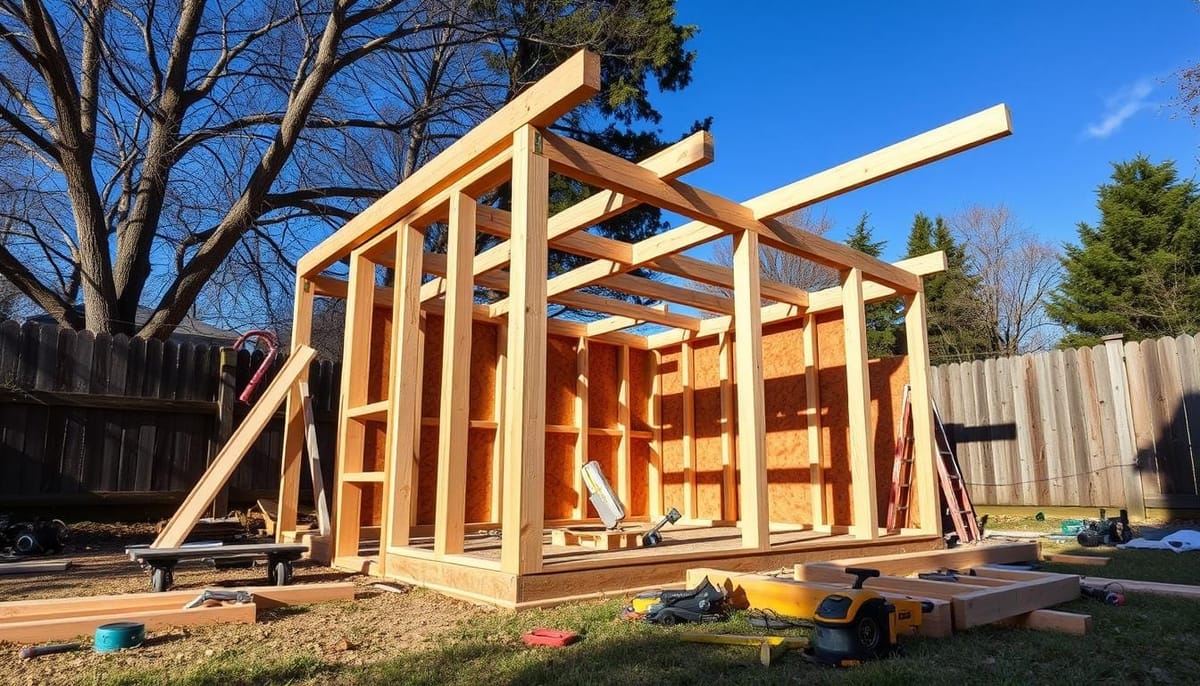
Wall Construction and Framing
Building the walls of your shed is a key part of the process. The "stick-built" method is common, using 2x4 or 2x6 lumber for the studs and plates. It also includes headers above windows and doors.
Start by framing the back wall, making it a bit lower than the front. This allows for the roof slope. Use 2x4 studs 24 inches apart for stability. Assemble the wall panels on the ground, then raise and secure them to the floor frame.
- Use treated lumber for better durability against weather elements.
- Consider pre-assembling the wall frames with exterior panels for easier installation.
- Build the front wall next, leaving an opening for the door.
- Construct the side walls at a slight angle to match the sloped roof.
Make sure all walls are aligned and fastened to the floor frame. A well-built shed wall frame is essential for a sturdy shed.
https://www.youtube.com/watch?v=ig0O2mG6kB8
Shed expert Joseph Truini suggests 16 inches on center for the back wall studs. Side walls can be 24 inches apart. This shed wall framing method makes a strong, stable structure.
By following these wall assembly tips, you'll build a durable, attractive shed. It will meet your storage needs for many years.
Installing Windows and Doors
Installing shed windows and doors is key for a strong, weatherproof shed. We'll go through the steps for putting in window frames, doors, and adding hardware and trim.
Window Frame Assembly
The first step is to make the rough opening for the shed window installation bigger than the window. It should be ½ – ¾ inch larger. This space is for shimming and to ensure the window fits well.
At the bottom, leave a 1/4 – 3/8 inch gap. Use 4 shims, each 1 inch long and 5/8 – 3/4 inch wide.
Next, prepare the rough opening. Then, build the outer window frame with 2x3 pressure-treated lumber. Create an inner frame with 2x2 lumber for the glass and hinges.
Put the glass in the inner frame groove. Secure it with window beading.
Door Installation Guidelines
For the shed door framing, make a big enough opening in the front wall. Using a pre-fabricated door makes installation easier and ensures a good fit.
Follow the manufacturer's instructions for installing hinges and hardware. Make sure to seal any gaps to keep water out.
Adding Hardware and Trim
The last step is to add trim around windows and doors with 1x3 or 2x3 pressure-treated lumber. This gives a finished look and seals gaps. Use screws to secure the trim tightly.
Remember to install window and door hardware like handles, locks, and hinges. This completes the project.
By following these steps for shed window and door installation, you'll have a sturdy and attractive shed. It will last for years.
Roof Framing and Installation
Building a strong shed roof is key in your shed project. It keeps the inside dry and adds beauty to your backyard. Let's explore how to frame and install the roof.
Start by making the roof trusses with 2x4 or 2x6 lumber, based on your area's snow load. Place the rafters 16 to 24 inches apart, matching the floor joists for a neat look. Use blocking between the rafters for extra stability.
Then, cover the frame with plywood sheeting, making sure it reaches the overhang edges. Add a layer of roofing paper to keep water out. Install drip edges around the roof to direct water away from the shed walls.
Time to put on the roofing material. Asphalt shingles are a good choice, starting at the bottom and moving up. Stagger the rows to stop water leaks. Your shed's roof will be about 6'11" x 10'5" on each side.
The roof's slope is important for water flow. A 7:12 slope, or about 30 degrees, is common for sheds. But, a minimum of 3:12 is better to avoid leaks, especially with shingles.
By following these steps and considering the important factors, you'll get a strong, good-looking, and weatherproof shed roof. It will protect your shed for many years.
Exterior Finishing and Weatherproofing
Turning your new shed into a weather-resistant and good-looking structure is key. You need to focus on the exterior details. This includes picking the right siding, adding moisture barriers, and sealing any gaps. These steps will help your shed last for many years.
Siding Installation
Pick siding that matches your shed's look and keeps it dry. You can choose from T1-11 siding, vinyl, or wood boards. First, use 1x3 pressure-treated lumber for wall trim to finish the look. For T1-11, use 1/2" x 6" boards for a tight fit.
Adding Moisture Barriers
Keeping your shed dry is more than just siding. Add a moisture barrier under the siding for extra protection. This step is vital to keep your shed strong and prevent damage from too much moisture.
Sealing and Caulking
Make sure your shed is sealed tight with exterior-grade caulk on all joints and gaps. This stops water from getting in and causing harm. If you store things that need to stay cool, add insulation. Also, install vents or leave small gaps for air to flow.
By focusing on your shed's exterior, you make it strong and lasting. It will stand up to the weather and look great in your yard.
Conclusion
Building a DIY shed is a rewarding project. It needs careful planning, the right tools, and attention to detail. This guide has covered everything from laying the foundation to adding the finishing touches.
Always prioritize safety. Use NoCry work aprons, glasses, and gloves. Follow local building codes and get the necessary permits. This ensures your shed is safe and meets all requirements.
Regular maintenance is key. Check for leaks, repaint, and keep the foundation stable. This will make your shed last longer and look great.
Building a DIY shed takes patience and dedication. You can create a sturdy, customized shed that meets your needs. Whether it's a simple 4x8 or a larger 12x24, the feeling of accomplishment is unbeatable.
Enjoy the process and have fun. Your new shed will be a versatile storage solution that enhances your property's appeal.
FAQ
What are the essential steps for planning and preparing to build a shed?
First, check local building codes and get the needed permits. Then, pick a good spot for your shed. Lastly, make sure you have all the tools and materials ready.
How do I build a strong foundation for the shed?
Start by leveling the ground. Next, put in deck piers or concrete slabs. Finally, build a solid floor frame with beams and joists.
What are the key steps in constructing the shed walls?
Frame the back, front, and side walls. Use treated lumber for durability. Make sure everything is aligned and stable.
How do I install windows and doors in the shed?
For windows, build an outer and inner frame with recesses for glass. For doors, leave a space in the front wall. You can use a prefabricated door for easier setup.
What is the process for building and installing the shed roof?
Begin by making trusses with 2x4 or 2x6 lumber. Then, cover the frame with plywood. Next, add roofing paper for moisture protection. Finally, put on asphalt shingles.
How do I finish and weatherproof the shed's exterior?
Start by installing siding, like T1-11 or vinyl. Add moisture barriers and seal all joints with caulk. Finish with protective paint or stain.
Fyxes
Thoughts, stories and ideas.