DIY Guide to Laying Laminate Flooring | Step by Step

Updating your home's floors can change everything. Laminate flooring is a great choice because it's affordable and durable. This guide will show you how to install laminate flooring easily. You can pick from many styles to make any room look better, without using messy adhesives or grout.
Whether you're experienced with home projects or new to DIY, this guide will help. It's all about laminate flooring installation. With the right tools and materials, you can make your floors look professional. It's easier than you think.
Essential Tools and Materials for Installation
Want to make your living space look amazing with laminate flooring? You'll need the right tools and materials. I've installed thousands of square feet of laminate flooring myself. So, I've put together a list of what you'll need for a great job.
Required Tools for the Job
For installing laminate flooring, you'll need a few key tools. A circular saw, jigsaw, or handsaw is essential for cutting planks. You'll also need a utility knife for fine trimming, a hammer, and a tapping block or pull bar to secure joints.
A rubber mallet, tape measure, straightedge ruler, and Speed Square are also important. Don't forget an undercut jamb saw for door frames. A pencil, pry bar (if needed), and a shop vacuum for cleaning up are extra tools that can be helpful.
Materials and Supplies Checklist
- Laminate flooring planks
- Scrap wood pieces for spacers
- Underlayment with tape, if required
- Laminate flooring adhesive (e.g., Montinator®) for finishing touches
Safety Equipment Recommendations
Always prioritize safety when installing laminate flooring. Wear eye and ear protection when cutting. Use knee pads to protect your joints during the installation.
If you're new to this, consider getting an installation kit from a home improvement store. These kits usually have the basics like spacers, a tapping block, and a pull bar.
| Tool | Price |
|---|---|
| Jigsaw | $82.51 |
| Tapping Block | $20.36 |
| Pull Bar | $16.99 |
| Tape Measure and Pencil | $9.99 |
| Combination Square | $12.99 |
| Sliding T-Bevel | $27.48 |
| Drill and Spade Bit | $89.00 |
Preparing Your Space for New Flooring
Getting your space ready is essential for a great laminate flooring job. First, take out any old flooring, baseboards, and molding. Make sure the subfloor is clean, even, and smooth. If it's concrete, use a patching compound to fix any issues.
For wood subfloors, remove any nails sticking out and replace any damaged boards. If your floor is a bit uneven, foam underlayment can help even it out.
If you're installing in a basement or a room with lots of moisture, put down a vapor barrier first. Measure the room's width and divide it by the plank's width to figure out the best layout. Let the flooring sit in the room for at least 48 hours before you start.
Don't forget to remove heating registers and undercut door casings to the floor's final height.
- Subfloor preparation is crucial for a lasting and professional-looking laminate flooring installation.
- Accurately measuring the room and planning the layout can help ensure an efficient and visually appealing final result.
- The acclimation process allows the laminate planks to adjust to the temperature and humidity of the installation space, preventing potential issues down the line.
By spending time on proper preparation, you'll make your laminate flooring installation smooth and successful. Remember, paying attention to details during this step can greatly impact the final look.
Laying Laminate Flooring: The Core Installation Process
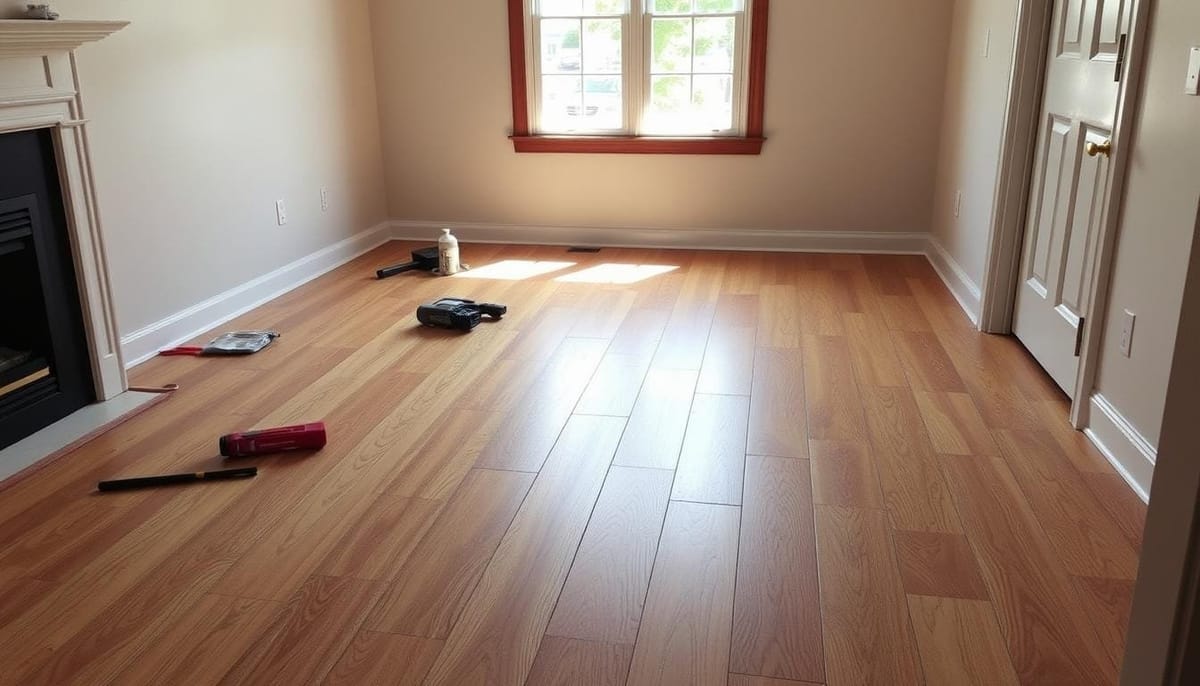
Laying laminate flooring is a simple DIY project that can change any room's look and feel. The key to success is knowing the core steps. Let's explore the main techniques for laminate plank installation. This will make sure your new flooring looks great, is stable, and lasts long.
Installing the First Row
Start by placing the first row of laminate planks along the longest wall. Use spacers to keep a 3/8-inch gap from the walls. This gap lets the flooring expand naturally. For the first row, cut the tongue edge of the planks to fit perfectly against the wall.
Staggering Patterns and Seams
When you move on to more rows, make sure to stagger the seams by at least 12 inches. This flooring pattern makes the floor look natural and adds stability. To join planks, place them at a 45-degree angle and tap them into place. Use a tapping block to close any gaps.
Working Around Obstacles and Corners
Dealing with obstacles and corners can be tricky, but with the right methods, you can get a pro-looking finish. Make cardboard templates of obstacles like door frames or pipes. Then, use these templates to cut the laminate planks precisely.
Always keep a 3/8-inch gap around all walls, obstacles, and corners for expansion. By following these steps, you can confidently install your laminate flooring. You'll get a beautiful, durable, and seamless finish.
https://www.youtube.com/watch?v=lP7B9B7WX1E
Understanding Underlayment and Moisture Barriers
When you're getting ready to lay laminate flooring, the underlayment and moisture barrier are key. Moisture barriers stop water damage. The underlayment helps with sound, keeps it warm, and covers small subfloor issues.
If your laminate flooring doesn't have underlayment, you'll need to add foam sheets. Make sure the edges fit together well without gaps. Use tape or special adhesive to seal the seams. In places like basements or bathrooms, add a vapor barrier first. This layer stops moisture from reaching your flooring, keeping it safe from water damage.
- Moisture barriers are used to protect flooring from damage. The need for them depends on the flooring type, subfloor, and local climate.
- There are different types of moisture barriers for hardwood floors. These include coatings, built-in protection, and water-resistant materials like underlayment.
- Always use a moisture barrier when installing flooring on concrete subfloors or in basements.
Using a moisture barrier has many benefits. It stops mold, prevents wood rot, and keeps hardwood floors from cupping. Vinyl plank and laminate flooring need a moisture barrier, especially in damp areas or on concrete.
Moisture barriers are vital for hardwood flooring, especially on concrete or in damp places. But, water-resistive underlayments are also important for other subfloors. Choosing the right moisture barrier is key to your laminate flooring's quality and life span.
Professional Tips for Perfect Cuts and Joints
Getting a perfect laminate floor installation needs careful cutting and fitting. DIY fans can use laminate cutting techniques for different jobs.
Cutting Techniques for Different Situations
For straight cuts, a table saw with a fine-tooth blade works best to avoid chipping. Use a circular saw or jigsaw on the plank's underside to prevent damage. For detailed cuts, a jigsaw gives you the most control.
For long cuts, use a straightedge or T-square to mark them. A Speed Square is great for precise crosscuts.
Managing End Joints and Transitions
It's important to fit end joints tightly for a smooth flooring transitions. Use a pull bar to tap planks together for a strong bond. For different flooring types or doorways, add transition strips to fill the gap.
Door Frame and Trim Solutions
To fit laminate around door frames, use an undercut saw to trim the frame. This lets the flooring slide underneath for a clean finish. After installing, remove spacers and add trim installation to cover expansion gaps along walls.
| Cutting Technique | Best for | Tips |
|---|---|---|
| Table Saw | Long, straight cuts | Use a fine-tooth blade to minimize chipping |
| Circular Saw or Jigsaw | Angled or curved cuts | Cut on the underside of the plank |
| Jigsaw | Intricate notches and shapes | Provides the most control for precise cuts |
| Straightedge or T-Square | Marking long cuts | Ensures straight, accurate lines |
| Speed Square | Crosscuts | Helps maintain consistent 90-degree angles |
Conclusion
Installing laminate flooring is a DIY project that can change your home. With the right prep, tools, and focus, you can put in a strong, good-looking laminate flooring. This will make your home look better and increase its value.
Remember to let the flooring expand, keep gaps even, and take your time with cuts. This will help you get a professional finish.
Laminate flooring is great because it's affordable, durable, and easy to clean. But, it can be sensitive to moisture and slippery. Still, with your new skills, you've made your home better and learned a lot for future projects.
By following our guide and embracing the DIY success of laminate flooring, you can make a stunning, lasting floor. Your neighbors will be jealous. Enjoy the pride of making your space beautiful.
FAQ
What tools are required for installing laminate flooring?
You'll need a circular saw, jigsaw or handsaw, and a utility knife. A hammer, tapping block or pull bar, and rubber mallet are also essential. Don't forget a tape measure, straightedge ruler, Speed Square, pencil, and undercut jamb saw.
What materials are needed for a laminate flooring project?
You'll need laminate flooring, scrap wood spacers, and underlayment with tape if needed. An installation kit from a home improvement store is helpful. It usually includes spacers, a tapping block, and a pull bar.
How do I prepare the subfloor for laminate flooring?
Start by removing any existing flooring, baseboards, and molding. Make sure the subfloor is clean, level, and smooth. For concrete subfloors, use a patching compound if needed. For wood subfloors, remove protruding nails and replace damaged boards.
How do I begin the laminate flooring installation process?
Begin by installing parallel to the longest wall. Use spacers to maintain a 3/8-inch gap along the walls for expansion. For the first row, trim the tongues off the boards facing the wall. Ensure any cut pieces are at least 16 inches long.
Why is underlayment important for laminate flooring?
Underlayment is key for laminate flooring. It absorbs sound, provides thermal insulation, and bridges minor subfloor imperfections. In moisture-prone areas, a vapor barrier should be installed before the underlayment to prevent water damage.
How do I make precise cuts and manage transitions with laminate flooring?
For precise cuts, use a table saw with a fine-tooth blade. When using a circular saw or jigsaw, cut on the plank's backside to reduce surface chipping. For notches and curves, a jigsaw works best. Use a long straightedge or T-square for marking long cuts, and a Speed Square for crosscuts. For end joints and transitions, use a pull bar to ensure tight fits. Install transition strips between different flooring types or in doorways.
Fyxes
Thoughts, stories and ideas.


