How to Build a Surfboard: A Guide for Beginners
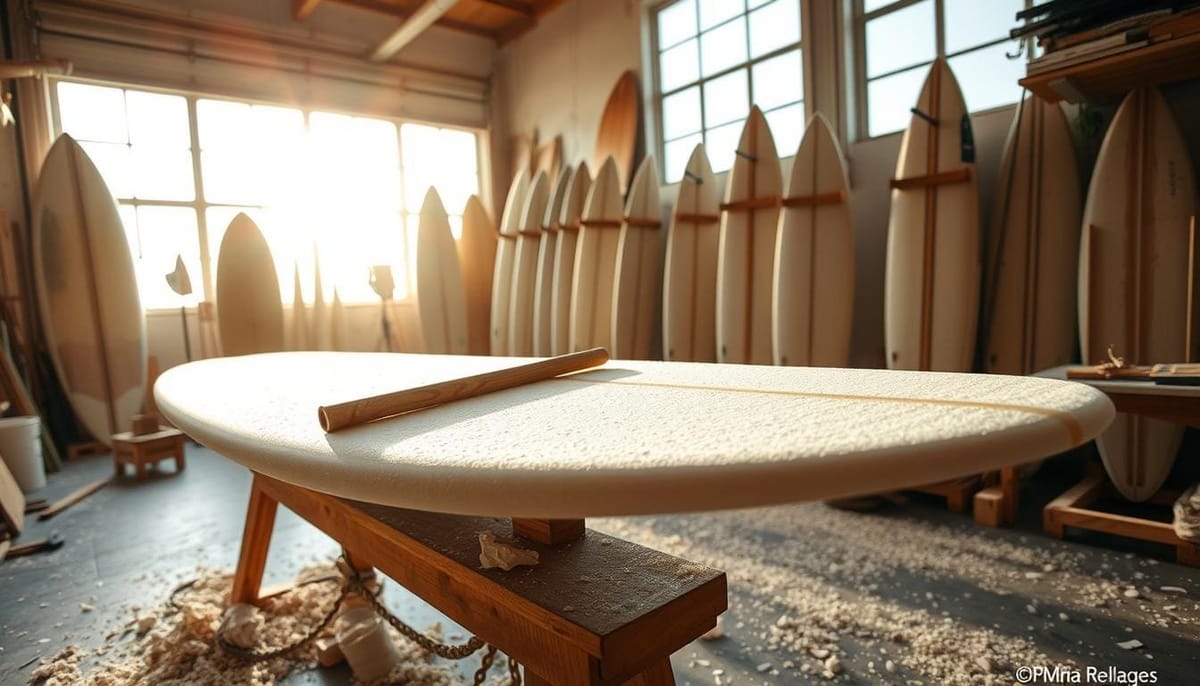
Building a surfboard is a fun and creative project. It lets you make your board just right and improve your surfing skills. This guide will show you how to make your own surfboard, from starting with a foam blank to adding fiberglass and resin. It's perfect for beginners or experienced shapers looking to get better.
The steps to build a surfboard include setting up your workspace, learning about design, shaping the foam, applying fiberglass and resin, and adding fins. Greenlight Surf Co. has lots of help for beginners, like a Masterclass Instructional Video Series. It covers everything you need to know.
With patience, the right tools, and the right methods, you can make a surfboard that fits you perfectly. Follow the steps and use the resources available. You'll soon be a skilled surfboard builder, enjoying the excitement of riding a board you made yourself.
Essential Tools and Materials for Surfboard Building
Making a surfboard needs special tools and materials. You'll need everything from basic shaping tools to protective gear. This section will cover the key items for turning a blank into a top-notch surfboard.
Basic Shaping Tools
The first step in making a surfboard is shaping. You'll need a G-rasp, Rasputin 24" Rasp Tool, Rail Runner Tool, handsaw, shaping weight, sanding blocks, and sandpaper. These tools help you shape the blank into a smooth, fast board.
Glassing Equipment
After shaping, it's time to add fiberglass and resin. You'll need resin spreaders, mixing buckets, sharp shears, and brushes. Tools like the Ink Jet Logo Paper and Razor Scraper/Cutlap Tool are also useful for detailed work.
Safety Gear and Protective Equipment
Building a surfboard can be messy and dangerous. It's important to wear protective gear like dust masks and safety glasses. Tools like the G-square and rocker stick can also improve your shaping skills.
With the right surfboard shaping tools, fiberglass materials, surfboard resin, and protective gear, you're ready to start. Remember, the right tools and a safe workspace make the process fun and successful.
| Tool Category | Essential Tools | Optional Tools |
|---|---|---|
| Shaping Tools |
|
|
| Glassing Equipment |
|
|
| Safety Gear |
|
N/A |
Setting Up Your Workspace
Making a surfboard needs a dedicated area for all steps, from shaping the blank to applying fiberglass and resin. You don't need a fancy surfboard shaping bay. A garage, basement, or any enclosed area works great for DIY projects.
For a good workspace, you need a few key things:
- Adequate lighting: Use side lighting, 4-6 inches above the surfboard blank, for the best view while shaping.
- Sufficient space: Aim for a room that's 15 feet long, 10 feet wide, and 11 feet tall. Smaller spaces can be hard to work in.
- Dust protection: Make sure your area has good ventilation and air conditioning. This helps remove harmful fumes and dust.
- Tool organization: Keep your tools and equipment on DIY shaping racks and glassing stands. This makes them easy to find and keeps your area tidy.
| Workspace Element | Recommended Specification |
|---|---|
| Dimensions | 15' length x 10' width x 11' height |
| Lighting | Side lighting, 4-6 inches above blank surface |
| Wall Color | Blue, green, or black to complement white boards |
| Ventilation | Air conditioning and fans to extract fumes and dust |
With a well-planned and organized workspace, you're ready to build your own surfboard. You'll do it with confidence and ease.
https://www.youtube.com/watch?v=i4MFjONJ3dY
Understanding Surfboard Design Fundamentals
Building your own surfboard means knowing the key design elements. These include the foam blank type, board dimensions, rocker profiles, and rail shapes. Each plays a big role in how the board performs in the water.
Choosing the Right Blank Type
The foam blank is the surfboard's base. Traditionally, surfers used polyurethane (PU) foam. But, expanded polystyrene (EPS) foam is now popular for its light weight and better performance. Think about the board shape, wave conditions, and your surfing skills when picking a blank.
Board Dimensions and Templates
The surfboard's size, like length, width, and thickness, affects its handling and performance. Longboards are 8'6" and longer, offering stability and ease. Shortboards are 5'6" to 6'2", great for quick turns. Mid-length fun shapes are a good mix, perfect for beginners and intermediate surfers.
To get the right size, use templates or ask local surf shops. They can help based on your height, weight, and experience.
Rocker Profiles and Rail Designs
The rocker and rail shape greatly influence the surfboard's ride. Flat rockers are stable and fast. Continuous rockers are better for quick turns. Concave rails cut through water, while rounded rails offer a smoother ride.
Knowing these design elements helps choose the right surfboard. Try different shapes and designs to find your perfect match.
| Board Type | Typical Length | Key Characteristics |
|---|---|---|
| Longboard | 8'6" and longer | Stable, easy to paddle, and suitable for smaller waves |
| Shortboard | 5'6" to 6'2" | Highly maneuverable, designed for larger, faster waves |
| Mid-length Fun Shape | 6'6" to 8' | Versatile, offering a balance between stability and performance |
How to Build a Surfboard: The Shaping Process
Building a surfboard is a rewarding and hands-on process. It requires patience, attention to detail, and a good understanding of surfboard design. The shaping stage is key, as it affects the board's performance and feel in the water.
To start, trace the desired outline symmetrically onto the foam blank. Use a handsaw to cut along the outline, removing excess foam. This rough cut is the foundation for the next steps.
- Foam Shaping: Use planes, sanders, and specialized shapers to refine the board's shape. Keep it symmetrical and the right thickness throughout.
- Rail Shaping: Focus on the board's rails, as they impact performance and responsiveness. Shape them carefully, avoiding over-correcting or removing too much material.
- Bottom Contours: Beginners should start with flat or subtle vee/concave bottom contours. These provide a stable and forgiving ride. As you get better, try more complex shapes.
The shaping process needs patience, practice, and attention to detail. By mastering surfboard shaping, you can make a board that looks great and performs well in waves.
| Tool/Material | Typical Cost Range |
|---|---|
| Foam Blank | $60 - $200 |
| Fiberglass Resin | $40 - $60 per gallon |
| Fiberglass Fabric | 8 - 10 yards (4 oz. or 6 oz.) |
Remember, shaping is just one part of building a surfboard. With the right tools, materials, and attention to detail, you can make a custom surfboard. It will help you conquer waves with confidence and style.
Fiberglass and Resin Application Techniques
Glassing is a key step in making a surfboard. It involves laying fiberglass cloth and applying resin. Getting the resin-to-hardener ratio right is crucial to avoid problems.
The cutlap method helps make clean edges on your board.
Laminating Process
The laminating process needs patience and precision. Start by cutting and placing the fiberglass cloth. Then, apply the resin mixture evenly, making sure to avoid air bubbles.
The curing time depends on the hardener speed, temperature, and humidity. It can take from 1 to 4 hours to start. After 7 days, the epoxy resin will fully cure, making your surfboard strong and durable.
Hot Coating Methods
Hot coating uses extra hardener for faster drying. It makes the surfboard's surface smoother and more even. This method is great for complex shapes. But, it's important to be careful and follow safety rules.
Common Glassing Mistakes to Avoid
One big mistake is mixing resin wrong, which can cause uneven application and structural problems. Not having enough air in your workspace is also a risk. The fumes from resin and fiberglass can be harmful.
To glass your surfboard right, follow safety tips, wear the right gear, and keep your area well-ventilated. Avoiding these mistakes will help you make a strong, beautiful surfboard.
For more on surfboard glassing, fiberglass application, resin techniques, and hot coating, check out our detailed guide.
FAQ
What are the key steps involved in building a surfboard?
Building a surfboard takes patience, the right tools, and proven methods. You'll shape, glass, and finish the board. First, prepare your workspace and learn about design basics. Then, shape the foam blank and apply fiberglass and resin. Don't forget to install fins.
What essential tools and materials are needed for surfboard building?
You'll need shaping tools like G-rasp, Rasputin 24" Rasp Tool, and Rail Runner Tool. Handsaw, shaping weight, sanding blocks, and sandpaper are also key. For glassing, you'll need resin spreaders, mixing buckets, shears, and brushes.
Remember, safety is important. Wear dust masks and protective glasses. Optional tools like G-square and rocker stick can be helpful. For glassing, you'll need fiberglass cloth, resin, hardener, and application tools.
How important is the workspace setup for successful surfboard building?
A good workspace is essential for building a surfboard. While a professional shaping room is best, garages or basements work too. Your workspace should have good lighting, enough space, dust protection, and organized tools.
Greenlight offers free plans for building portable shaping racks and glassing stands. You can use basic materials like 2x4s, buckets, and sand.
What design considerations should beginners keep in mind?
Before you start shaping, learn about design basics. Understand blank types, board dimensions, rocker profiles, and rail shapes. Beginners should start with simple designs like funboards, longboards, or single-fin shortboards.
Research existing boards and use Greenlight's Surfboard Design Guide. Surf shops can also provide measurements and design ideas.
Can you describe the shaping process in detail?
The shaping process starts with drawing an outline and cutting the blank. Use a handsaw for the rough cut. Then, refine the shape with planes and shapers, focusing on symmetry and thickness.
Shape the rails last, being careful not to remove too much material. Beginners should start with flat or subtle vee/concave designs for bottom contours.
What are the key steps and considerations for the glassing process?
Glassing is a critical step that requires care. It involves laying fiberglass cloth and applying resin. Use the right resin and hardener mix to avoid problems.
The cutlap method can help create clean edges. Hot coating uses extra hardener for a quicker finish. Always wear protective gear and ensure good ventilation during glassing.
Fyxes
Thoughts, stories and ideas.

